Cut, Break, Create—Celebrating Anniversary with Stained Glass Art
To celebrate our 5th anniversary, we joined a stained glass workshop and turned our weird little sketch into real glass art. Best date ever!
This March marks our 5th wedding anniversary, so my husband and I asked stained glass artist Alex to hold a private stained glass workshop for us to celebrate our 5th anniversary!
I first learned about the workshop at an open studio event in February, where I met Alex. The moment I saw her studio filled with colorful glass pieces sparkling in the light, I was hooked! Since taking a glassblowing workshop with my husband's family last year, we had been wanting to try more crafts, so this was the perfect opportunity.
Alex offers two types of workshops, and we chose Tier 2, where we can create our own original design—perfect for us since we love creative projects! The process involves sketching a design beforehand and completing our stained glass pieces over two three-hour sessions.
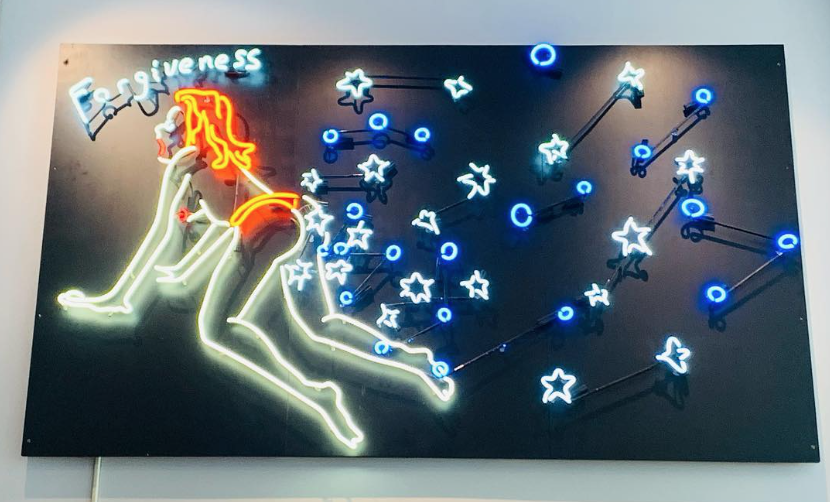
I wanted to create something humorous, inspired by a neon art piece I once saw in an LA hotel—a woman farting out stardust. My husband and I brainstormed ideas together and sketched out the design.
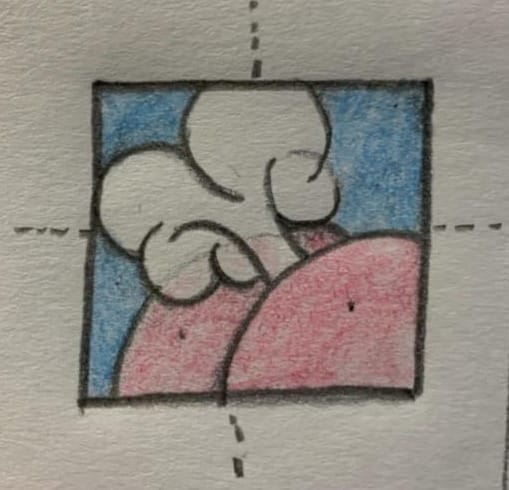
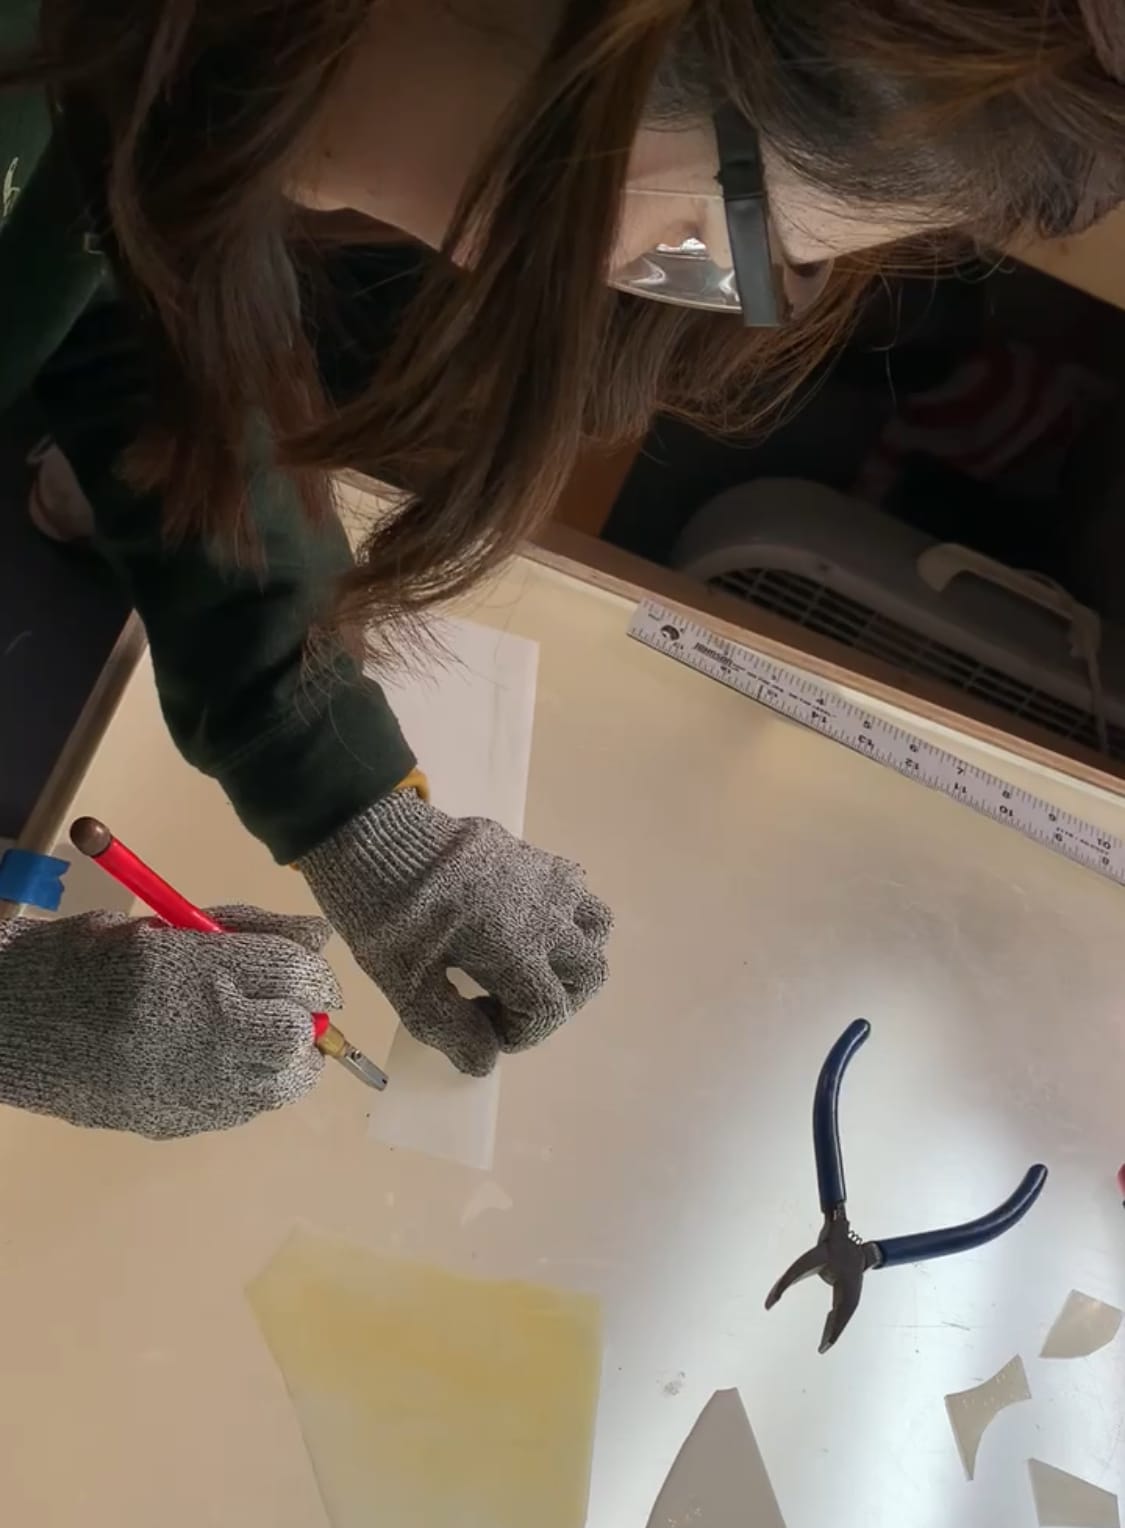
On the day of the workshop, we first drew our design to scale on graph paper and adjusted it with Alex’s guidance to ensure it would work as a stained glass piece. Since stained glass is essentially like a puzzle made of glass pieces, we had to modify the design so that all the pieces connected properly. (For example, open-ended shapes aren’t possible, and each piece must be touching another.) Once we finalized the design, we colored it in with pencils, numbered the pieces, and created our master reference sheet.

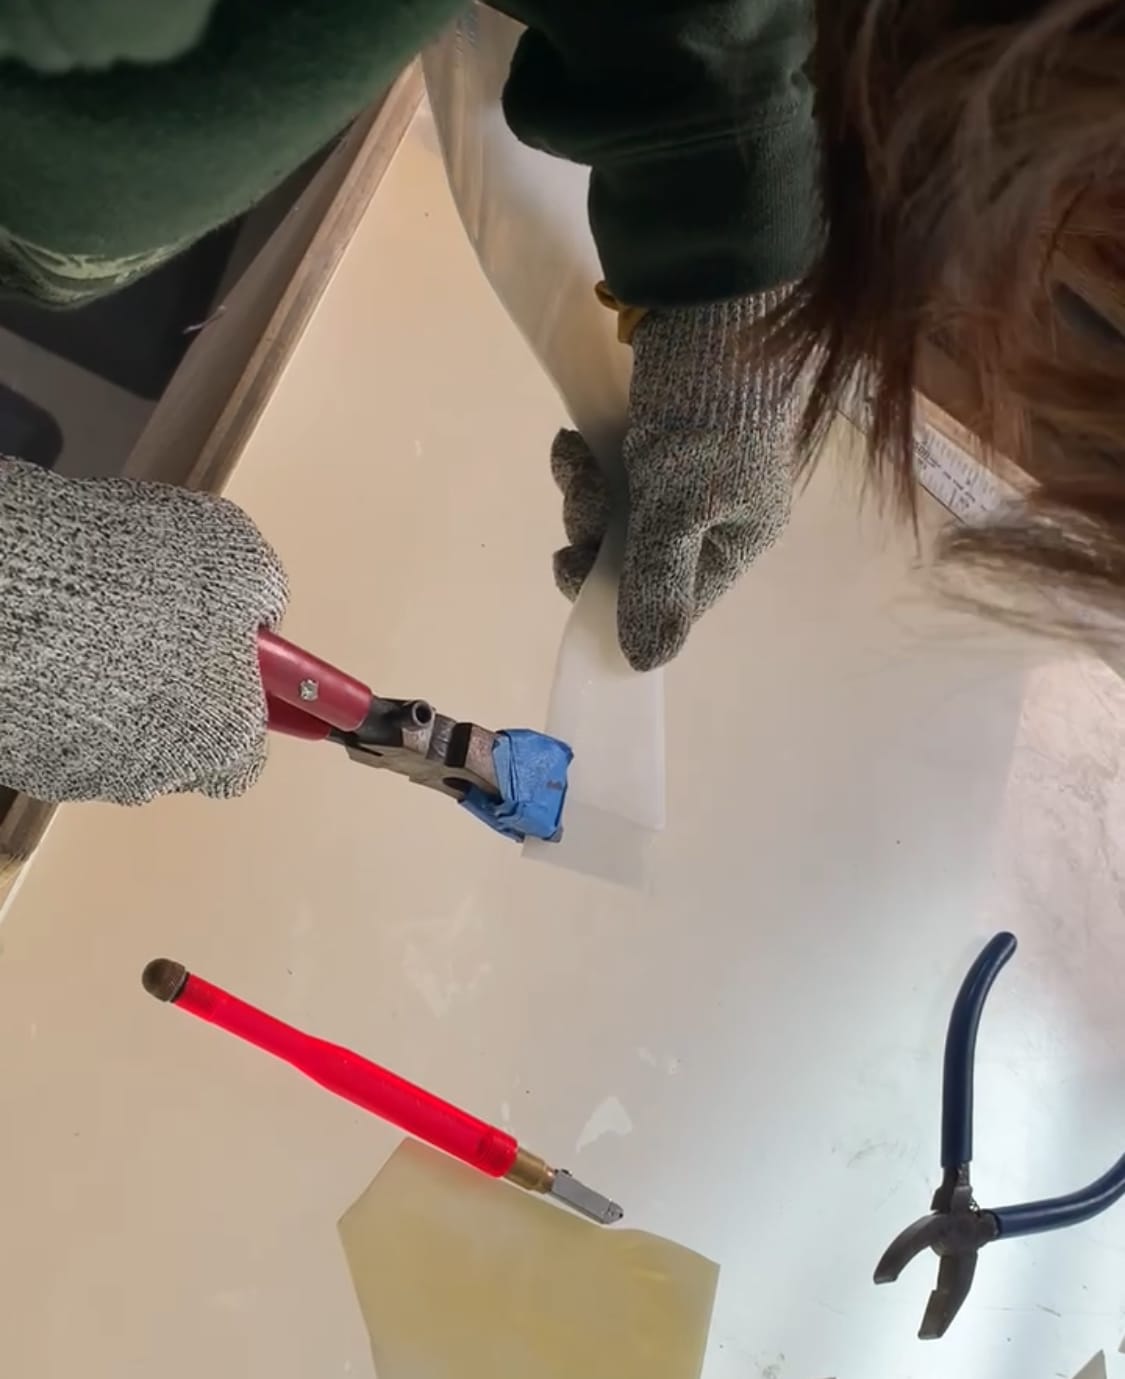
Next, we traced the design onto a separate sheet and cut out each piece using special three-blade scissors—which automatically left a small gap for the soldering lines. This tool was incredibly handy!
We then transferred the cut-out pieces onto actual glass sheets using a Sharpie and moved on to scoring the glass with a glass cutter. Apparently, the “crunchy” sound means you’re cutting correctly, but when I tried it myself, it was way harder than I expected! The first cut wouldn’t sink in properly, and the tool kept slipping—it was a real challenge.
Once we had our scored glass, it was time to break it apart—a process full of nail-biting moments. Using running pliers, we carefully applied pressure to break the glass along the scored lines.
When it worked, the sense of relief was incredible, but when I misjudged the pressure and cracked an important piece… well, let’s just say the feeling of despair was real. It was an emotional rollercoaster!
Choosing the perfect glass was also exciting—deciding which colors to use, whether to flip the pieces for different textures, and figuring out which part of the pattern to use all added to the fun.
I can’t wait to see how they turn out!